Using ATI Vision with Raptor: Difference between revisions
Jump to navigation
Jump to search
mNo edit summary |
No edit summary |
||
| (7 intermediate revisions by 3 users not shown) | |||
| Line 1: | Line 1: | ||
{{DISPLAYTITLE:Programing and | {{DISPLAYTITLE:Programing and Calibrating Raptor Controllers and Displays with ATI Vision}} | ||
=ATI Vision= | |||
The following information is also contained in PDF format: [http://www.neweagle.net/support/wiki/ProductDocumentation/Raptor/Raptor-Dev/Using_ATI_Vision_with_Raptor.pdf Using ATI Vision with Raptor (PDF)] | |||
This information is also included in the 'Documentation' folder of the installation directory for Raptor-Dev. | |||
==Online Calibrations== | |||
While New Eagle's [[Raptor-Cal]] offers the most integrated support of typical calibration methodology workflows, we understand that you may already be familiar with a particular third-party calibration tool. As a result, [[Raptor-Controllers]] and [[Raptor-Displays]] support the industry standard XCP protocol, available in common calibration tools. | While New Eagle's [[Raptor-Cal]] offers the most integrated support of typical calibration methodology workflows, we understand that you may already be familiar with a particular third-party calibration tool. As a result, [[Raptor-Controllers]] and [[Raptor-Displays]] support the industry standard XCP protocol, available in common calibration tools. | ||
* Open ATI Vision and select 'File->New...->Project File' | * Open ATI Vision and select 'File->New...->Project File' | ||
** Name the project file | ** Name the project file | ||
[[file:ATI1.png|400px]] | |||
* Right click on 'Computer', then click 'Add Device...' | * Right click on 'Computer', then click 'Add Device...' | ||
[[file:RaptorCalibrationTools_AddDevice.jpg|400px]] | [[file:RaptorCalibrationTools_AddDevice.jpg|400px]] | ||
* Select 'USB Port' | |||
[[file:ATI4.png|400px]] | |||
* Click 'OK' | |||
[[file:ATI5.png|400px]] | |||
* Right click on 'USB', then click 'Add Device...' | * Right click on 'USB', then click 'Add Device...' | ||
[[file:ATI6.png|400px]] | |||
* Select 'USBCan II/Memorator/Leaf CAN Channel' or your CAN adapter | |||
[[file:ATI7.png|400px]] | |||
* Enter a name and press 'OK' | |||
[[file:ATI8.png|400px]] | |||
* Select the 'Settings' tab and enter the appropriate baud rate | * Select the 'Settings' tab and enter the appropriate baud rate | ||
[[file:RaptorCalibrationTools_SetBaud.jpg|400px]] | [[file:RaptorCalibrationTools_SetBaud.jpg|400px]] | ||
* Right click on your | |||
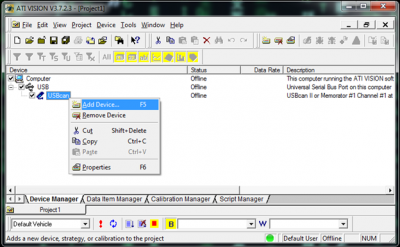
* Right click on your adapter (USBcan), then click 'Add Device...' | |||
[[file:ATI10.png|400px]] | |||
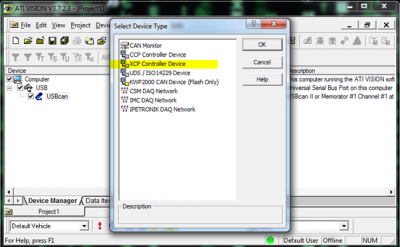
* Select 'XCP Controller Device' and then the name of the device in the subsequent dialog and press 'OK' | |||
[[file:ATI11.png|400px]] | |||
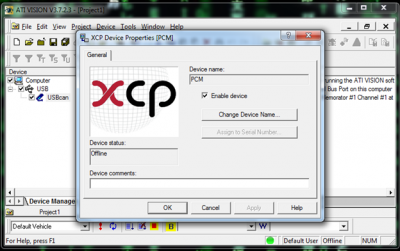
* Press 'OK' | |||
[[file:ATI12.png|400px]] | |||
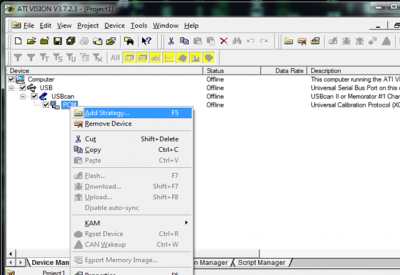
* Right click on your XCP device (PCM) and click 'Add Strategy...' | * Right click on your XCP device (PCM) and click 'Add Strategy...' | ||
[[file:ATI13.png|400px]] | |||
* Navigate to 'C:\Vision Projects\<ModelName' and select the strategy file you want to use | |||
[[file:RaptorCalibrationTools_SelectStrategy.jpg|400px]] | [[file:RaptorCalibrationTools_SelectStrategy.jpg|400px]] | ||
* Right click on '[Base Calibration]', then 'Save As...' and save a copy | * Right click on '[Base Calibration]', then 'Save As...' and save a copy | ||
** You must create a copy in order to edit calibrations | ** You must create a copy in order to edit calibrations | ||
[[file:ATI15.png|400px]] | |||
* Select 'File->New...' then 'Screen File' | * Select 'File->New...' then 'Screen File' | ||
[[file:ATI16.png|400px]] | |||
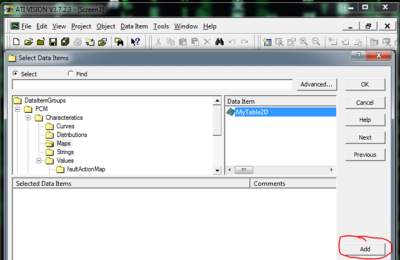
* When the new screen file opens, right click in the background and select 'Add Data Item Controls...' | * When the new screen file opens, right click in the background and select 'Add Data Item Controls...' | ||
[[file:ATI17.png|400px]] | |||
** Select and add the items you would like to display | ** Select and add the items you would like to display | ||
[[file:ATI18.png|400px]] | |||
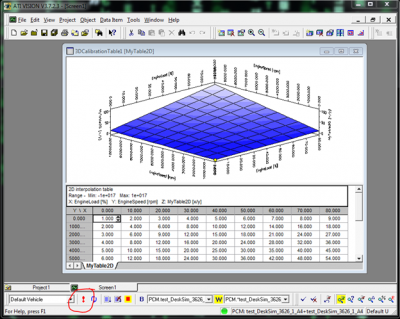
* Press the '!' button near the bottom left to go online | * Press the '!' button near the bottom left to go online | ||
[[file:ATI19.png|400px]] | |||
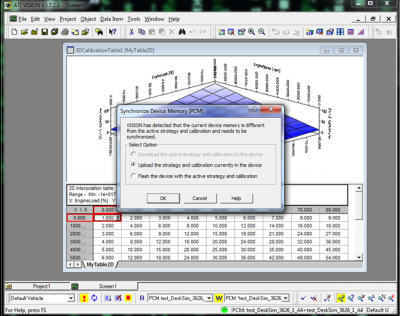
* Press 'Upload the strategy and calibration currently in the device' to pull the values from the ECU | |||
[[file:ATI20.png|400px]] | |||
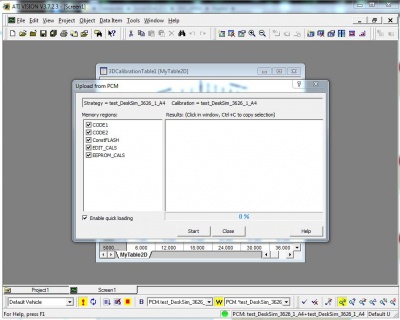
* Proceed to upload by pressing 'Start' | |||
[[file:RaptorCalibrationTools_StartUpload.jpg|400px]] | [[file:RaptorCalibrationTools_StartUpload.jpg|400px]] | ||
* When the upload is complete, press 'Close'. You are now online | * When the upload is complete, press 'Close'. You are now online | ||
[[file:ATI22.png|400px]] | |||
<br> | |||
==Merging offline Calibration Changes== | |||
* Once you have made offline changes or opened your calibraion file, right click on the ECU device in the tree (PCM), then 'Export Memory Image'. | * Once you have made offline changes or opened your calibraion file, right click on the ECU device in the tree (PCM), then 'Export Memory Image'. | ||
[[file:ATIoffline1.png|400px]] | |||
* Select 'Intel Hex-Record File'. | |||
[[file:RaptorCalibrationTools_SelectIntel.jpg|400px]] | [[file:RaptorCalibrationTools_SelectIntel.jpg|400px]] | ||
* Choose a location and save the file with a .hex extension. | |||
* Open | [[file:ATIoffline3.png|400px]] | ||
** Click ' | |||
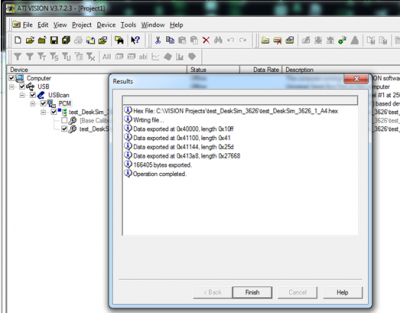
** Click ' | * Click finish | ||
[[file: | [[file:ATIoffline4.png|400px]] | ||
* | |||
* Open New Eagle's 'Raptor-Cal' | |||
** See [[Raptor-Cal]] for more information | |||
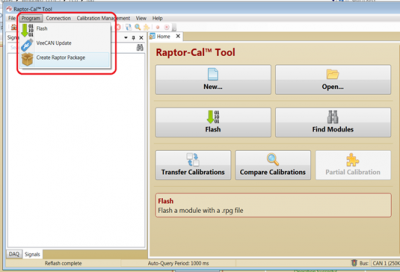
* Click 'Program' > 'Create Raptor Package' | |||
[[file:RaptorProgram.png|400px]] | |||
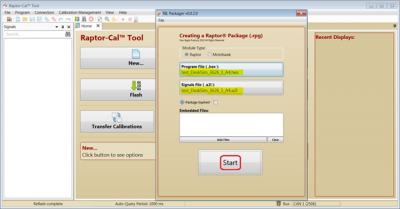
* Click on 'Program File (.Hex) and navigate to your new .hex file with offline calibration | |||
** Click 'start' | |||
[[file:RaptorPackager6.png|400px]] | |||
* Save the .rpg file created | |||
** Close the Raptor Package program | |||
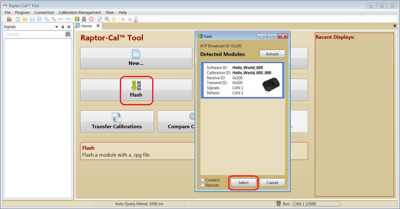
* Navigate to the 'Raptor-Cal' homepage and click 'Flash' | |||
[[file:RaptorFlash11.png|400px]] | |||
* Once the module (ECU) has been detected, click 'Select' | |||
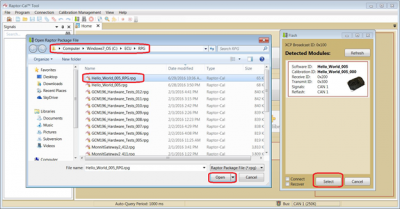
* Navigate to C:\ECU\RPG and open the .rpg file saved from using the Raptor Package program | |||
[[file:RaptorECU13.png|400px]] | |||
* Once the file is opened, it will automatically flash the ECU with offline calibrated changes | |||
Latest revision as of 14:57, 11 January 2023
ATI Vision
The following information is also contained in PDF format: Using ATI Vision with Raptor (PDF)
This information is also included in the 'Documentation' folder of the installation directory for Raptor-Dev.
Online Calibrations
While New Eagle's Raptor-Cal offers the most integrated support of typical calibration methodology workflows, we understand that you may already be familiar with a particular third-party calibration tool. As a result, Raptor-Controllers and Raptor-Displays support the industry standard XCP protocol, available in common calibration tools.
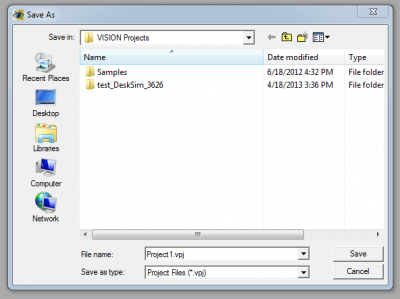
- Open ATI Vision and select 'File->New...->Project File'
- Name the project file
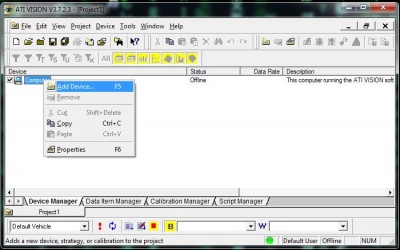
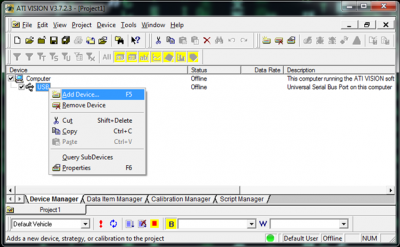
- Right click on 'Computer', then click 'Add Device...'
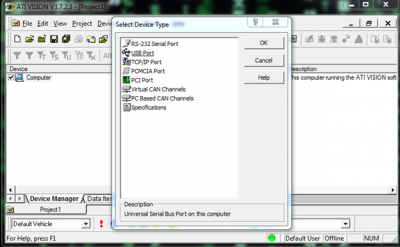
- Select 'USB Port'
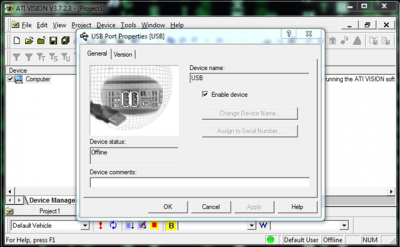
- Click 'OK'
- Right click on 'USB', then click 'Add Device...'
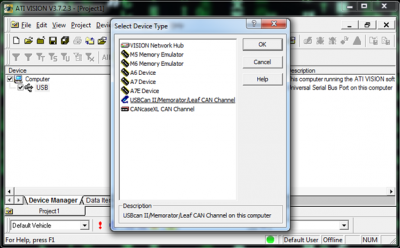
- Select 'USBCan II/Memorator/Leaf CAN Channel' or your CAN adapter
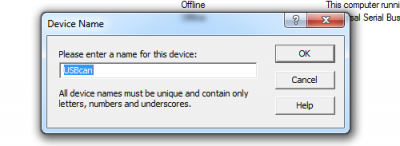
- Enter a name and press 'OK'
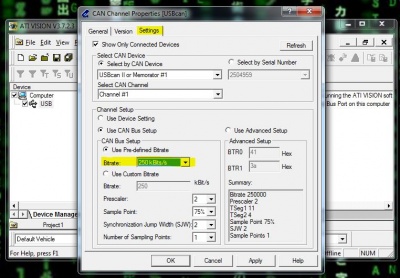
- Select the 'Settings' tab and enter the appropriate baud rate
- Right click on your adapter (USBcan), then click 'Add Device...'
- Select 'XCP Controller Device' and then the name of the device in the subsequent dialog and press 'OK'
- Press 'OK'
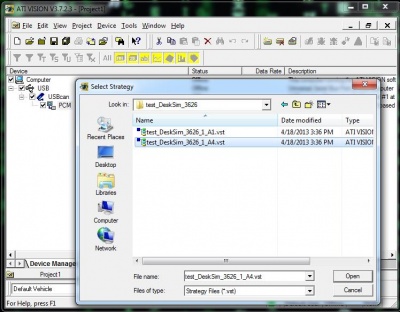
- Right click on your XCP device (PCM) and click 'Add Strategy...'
- Navigate to 'C:\Vision Projects\<ModelName' and select the strategy file you want to use
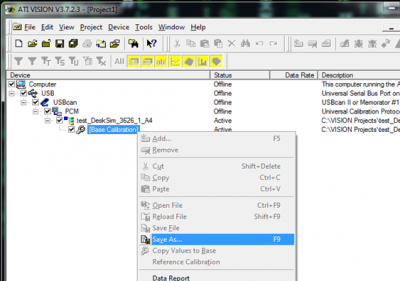
- Right click on '[Base Calibration]', then 'Save As...' and save a copy
- You must create a copy in order to edit calibrations
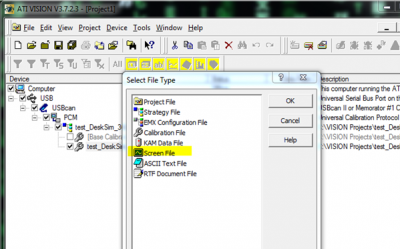
- Select 'File->New...' then 'Screen File'
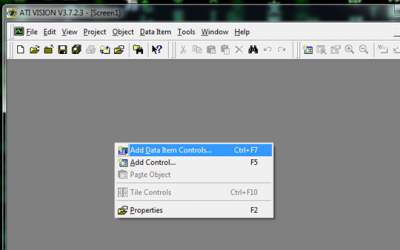
- When the new screen file opens, right click in the background and select 'Add Data Item Controls...'
- Select and add the items you would like to display
- Press the '!' button near the bottom left to go online
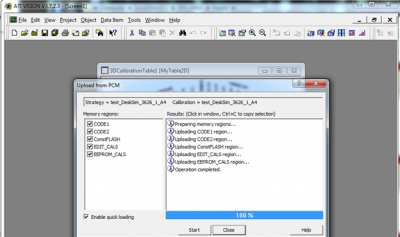
- Press 'Upload the strategy and calibration currently in the device' to pull the values from the ECU
- Proceed to upload by pressing 'Start'
- When the upload is complete, press 'Close'. You are now online
Merging offline Calibration Changes
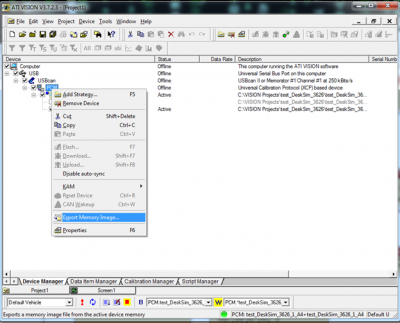
- Once you have made offline changes or opened your calibraion file, right click on the ECU device in the tree (PCM), then 'Export Memory Image'.
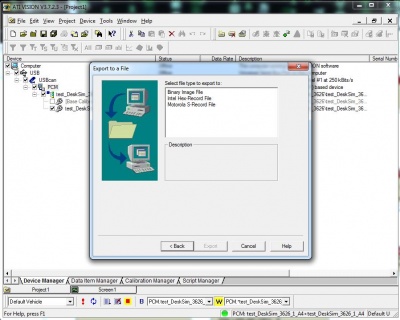
- Select 'Intel Hex-Record File'.
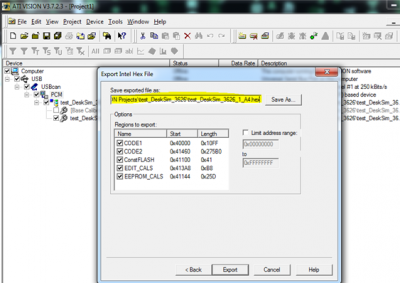
- Choose a location and save the file with a .hex extension.
- Click finish
- Open New Eagle's 'Raptor-Cal'
- See Raptor-Cal for more information
- Click 'Program' > 'Create Raptor Package'
- Click on 'Program File (.Hex) and navigate to your new .hex file with offline calibration
- Click 'start'
- Save the .rpg file created
- Close the Raptor Package program
- Navigate to the 'Raptor-Cal' homepage and click 'Flash'
- Once the module (ECU) has been detected, click 'Select'
- Navigate to C:\ECU\RPG and open the .rpg file saved from using the Raptor Package program
- Once the file is opened, it will automatically flash the ECU with offline calibrated changes
