NE VeeCAN320 Data Logger: Difference between revisions
| Line 55: | Line 55: | ||
=== Harness === | === Harness === | ||
New Eagle offers a harness | New Eagle offers a harness [http://store.neweagle.net/harness-veecan-320-display-power-4-ft-pigtail.html HARN-CAN-DP-03] (sold separately) to mate the data logger with a CAN bus environment, so far this harness we offered is only used for CAN1 channel. CAN2 needs isolated power supply, which must be wired separately in order to utilize CAN2. | ||
=== Downloads === | === Downloads === | ||
Revision as of 13:46, 21 January 2014
New Eagle VeeCAN320 Data Logger
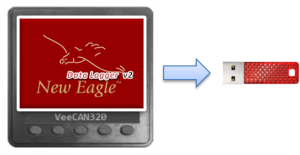
This logger utilizes a USB 2.0 stick for data storage and effortless data retrieval. Two CAN channels are provided, preconfigured to 250K and 500k, with logging at rates up to 1ms to make this device an ideal choice for most CAN bus environments. While the unit can function without user intervention, an interface button is provided to allow for multiple logging sessions. This data logging device can survive in the harshest environments due to its robust components.

Features
- CAN data logging
- Logging CAN bus data to a USB 2.0 stick
- Provide 2 CAN channels for data logging
- 250 KBaud CAN1 Bus, 500 KBaud CAN2 Bus
- Data Logging is limited only by the size of USB 2.0 stick (sold separately)
- Logging is started automatically when USB stick is plugged in
- Logging session is controlled via a button
- Capable of logging at rate of 1ms
- 320*240 pixel color display for real-time displaying logging status
- 10V-32V DC Powered
- Save data as text files, this allows the users to import data into excel or matlab.
- -20 - +70 degrees C operating temperature
- RS232 interface
USB Stick
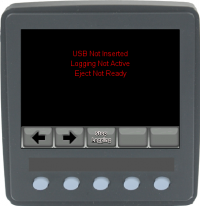
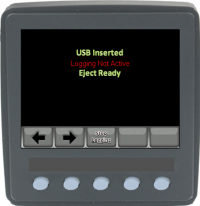
This logger can work with any brand and any volume USB drive. If the user needs to log a large set of data, we would recommend you to use a large volume USB stick; 16 GB is an ideal size. The USB status (Not Inserted/Inserted/Eject is Ready) is shown on the logging screen for real-time. The logging is started automatically after the USB is plugged in, if the screen is still showing ‘USB Not Inserted’ in red after the USB drive is plugged in for more than 10 seconds, then plug in the USB drive again, and wait for a few seconds until ‘USB Inserted’ is shown on the screen.
"Stop Logging" button
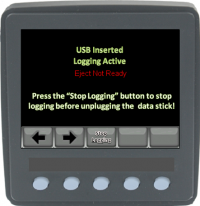
This logger provides a button to control the logging session, this allows for multiple logging sessions. It is important to stop the logging using this button, otherwise a key cycle will be required to initiate another logging session. Also, data loss may occur if the users unplug the USB before pressing this button.
Auto Logging
This unit can log data without user intervention. Keep the USB stick plugged in, then start a key cycle, and the logging session will be started automatically.
Logging Rate
This logger has been tested for logging at rates up to 1ms. We provide two CAN channels, CAN1 is preconfigured to 250K, CAN2 is preconfigured to 500K.
Before Logging
The "USB log offload" file should be in the USB stick before logging, this file is used for communicating with the logger to detect the USB status. Please click here to download.
How to Log Data
Logging is very easy and straight forward for this device; we offer a color display for logging information. After the logger is powered up, a screen with logging instruction will be shown on the screen, after the user plugs in the USB stick (don't forget to put "USB log offload" file in it), the screen will show the information that USB is inserted and the logging is started automatically. When you are done, press the "Stop Logging" button to stop the logging session, and prepare the USB stick for removal. Remove USB stick and plug it into the computer for processing data.
Data Files
The data files are named using log number. The logger will continue to run until there isn’t any space available for creating new files. All data is maintained until removed from the USB stick. The size of each file is determined by the logging period. The data file is a text file with all the CAN messages listed. This text file is formatted so that it can be imported into almost any CAN analyzing software. We recommend converter NETM-CDL-SW-001, which allows conversion of CAN data using industry standard DBC files; you can purchase it immediately on our web store, a trial version will be available soon; you can download it in the next section. The text file also can be imported into Matlab or Excel, which allows for further data processing.
New Eagle CDL Translation Software (Trial Version)
New Eagle offers translator software that translates the MEL raw CAN format on USB drive into engineering values using a DBC file.
You can purchase it immediately on the webstore. A trial of the software will be available soon.
Harness
New Eagle offers a harness HARN-CAN-DP-03 (sold separately) to mate the data logger with a CAN bus environment, so far this harness we offered is only used for CAN1 channel. CAN2 needs isolated power supply, which must be wired separately in order to utilize CAN2.


