Raptor:Getting Started
Return to the main Raptor page
Raptor Installation


Prerequisites
- MATLAB/Simulink
- Raptor requires a compatible installation of MATLAB/Simulink in order to create models for code generation. Currently you the following version(s) of MATLAB/Simulink are supported:
- 2011a 32/64 bit
- 2011b 32/64 bit
- 2012a 32/64 bit
- 2012b 32/64 bit
- Raptor requires a compatible installation of MATLAB/Simulink in order to create models for code generation. Currently you the following version(s) of MATLAB/Simulink are supported:
- Compiler
- To compile the generated code properly for your embedded platform, the appropriate compile and associated license will be required. For instance, Raptor targets with a Freescale 55xx Microprocessor will require the CodeWarrior 55xx compiler.
- .NET Framework
- Raptor requires the .NET framework from Microsoft that comes preinstalled on most current version of the Windows platform. If this is not installed prior to running the Raptor installation program, it will be downloaded (internet access required) during the installation process.
- If necessary, the .NET framework can be downloaded manually at: www.microsoft.com
MATLAB Version support
Raptor currently requires Windows 7 (32 or 64 bit versions) and MATLAB 2012a+
Installation
- Download and run the latest Raptor installer program
- Follow the instructions and change the options to your liking
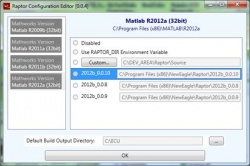
- When the installer finishes, run the 'Raptor Configuration Editor'
- This shows which versions of MATLAB and Raptor are compatible
- Set the configuration settings for your version of MATLAB
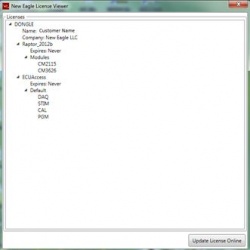
- Verify your Raptor License
- Open the Start menu and go to "New Eagle -> New Eagle License Viewer"
- From the MATLAB command prompt, type >>raptor_check_license
- Verify MATLAB/Simulink Integration
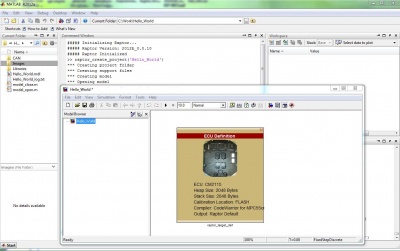
- When Raptor has been properly integrated, you will see the following message upon starting MATLAB:
Software/Code-Generation
Creating a Sample Raptor Project
The easiest way to create a new Raptor project is to use the 'raptor_create_project' script from the command prompt. This script will create a new project with the appropriate code-generation settings for Raptor. The new project will have a few useful folders where you may want to store project files in the future (CAN, Images, Libraries). These folders are automatically added/removed from the path when the model is opened/closed via the model_open/model_close scripts that are generated alongside the model (mdl) file.
- Open MATLAB and in the command prompt type >> raptor_create_project
- This will create a new project with the appropriate settings for Raptor
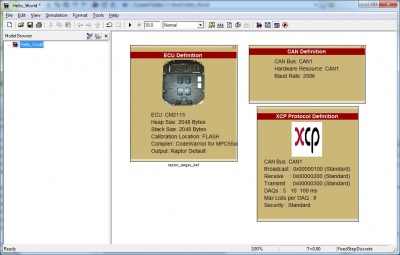
- Select the proper target with the ECU definition block
- Build the project by pressing 'CTRL + B' or select 'Tools->Code Generation->Build Model'
- If successful, a message indicating so will appear in the command window
- The output files will be created and placed (by default) in C:\ECU
- Add an XCP block to allow communication with ECU using a calibration tool
- Build a second time and note that an A2L file is generated
- If ATI Vision is installed, a Vision Strategy File will be generated
- Open the proper tool to load software on to the module and load the new VSF file
- For the CM2115 and CM3626, use the Vansco Flashloader, found in the Raptor installation directory


