Using ATI Vision with Raptor
Return to the main Raptor page
Working with Calibration Tools
Raptor supports the standard XCP calibration protocol. Therefore, common third party tools such as CANape, INCA, and ATI Vision are supported.
Setup ATI Vision
- Open ATI Vision and select 'File->New...->Project File'
- Name the project file
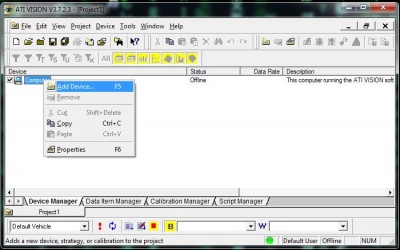
- Right click on 'Computer', then click 'Add Device...'
- Select 'USB Port' and click 'OK'
- Right click on 'USB', then click 'Add Device...'
- Select 'USBCan II/Memorator/Leaf CAN Channel' or your CAN adaptor
- Enter a name and press 'OK'
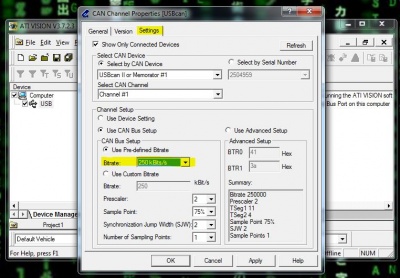
- Select the 'Settings' tab and enter the appropriate baud rate
- Right click on your adaptor (USBcan), then click 'Add Device...'
- Select 'XCP Controller Device' and then the name of the device in the subsequent dialog and press 'OK'
- Press 'OK'
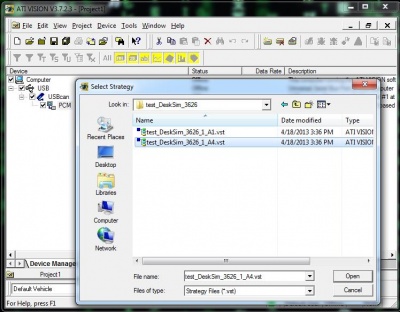
- Right click on your XCP device (PCM) and click 'Add Strategy...'
- Navigate to 'C:\Vision Projects\<ModelName' and select the strategy file you want to use
- Right click on '[Base Calibration]', then 'Save As...' and save a copy
- You must create a copy in order to edit calibrations
- Select 'File->New...' then 'Screen File'
- When the new screen file opens, right click in the background and select 'Add Data Item Controls...'
- Select and add the items you would like to display
- Press the '!' button near the bottom left to go online
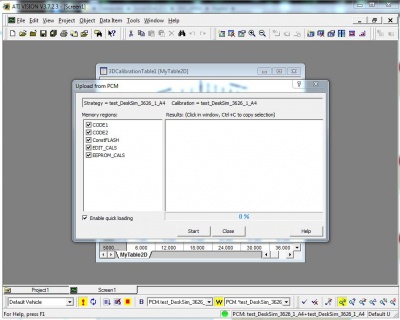
- Press 'Upload the strategy and calibration currently in the device' to pull the values from the ECU
- Proceed to upload by pressing 'Start'
- When the upload is complete, press 'Close'. You are now online
Merging offline Calibration Changes
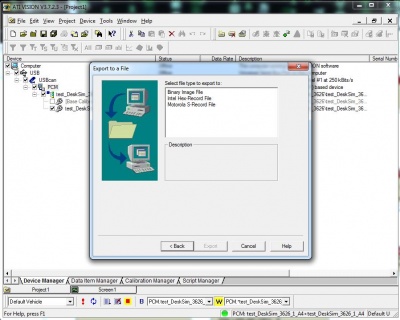
- Once you have made offline changes or opened your calibraion file, right click on the ECU device in the tree (PCM), then 'Export Memory Image'.
- Select 'Intel Hex-Record File'.
- Choose a location and save the file with a .hex extension.
- Click finish
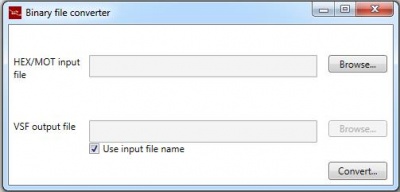
- Open the converter utlity: 'BinaryConverter.exe'
- Click 'Browse...' and navigate to your hex file
- Click 'Convert'
- Your new VSF file can be programmed using the Vansco Flashloader and will contain the changes from your calibration file
