MotoService: Difference between revisions
| (116 intermediate revisions by 9 users not shown) | |||
| Line 1: | Line 1: | ||
{{Navigation}} [[MotoHawk-Platform | MotoHawk Platform]] > '''MotoService''' | |||
MotoService | |||
=Introduction= | |||
MotoService consists of two powerful applications in one package. MotoService combines MotoViewer which is an economical display and diagnostic tool and MotoUpdate for field flashing of electronic control units. MotoService is used to distribute the following two apps to vendors in one installation file. | |||
=MotoViewer= | |||
[[File:MotoViewer0.jpg|right|300px|thumb|MotoViewer]] | |||
'''[[MotoViewer]]''' provides an economical solution for basic ECM data and diagnostic needs. | |||
'''Key Features''': | |||
* Graphical data logging | |||
* Detailed fault diagnostic list | |||
* View ECM fault history | |||
* Clear active and historic faults | |||
* View engine runtime hours | |||
* View engine sensor data | |||
* Chart option to graph data | |||
* Extensive use of Microsoft GUI standards to promote user familiarity | |||
* Comprehensive online help system | |||
==MotoUpdate | =MotoUpdate= | ||
[[File:MU_welcome.JPG|right|300px|thumb|MotoUpdate]] | |||
The '''[[MotoUpdate]]''' tool provides an easy solution for reprogramming ECMs in the field or service shop. | |||
'''Key Features:''' | |||
* User friendly application — limited PC experience required to operate | |||
* Allow field/service personnel to update an ECM when new calibrations are required | |||
* Simple one-step process | |||
* Save time and money by updating the ECM on site. | |||
* Easy-to-use application | |||
* Operator friendly: requires basic computer skills to initiate the programming download to ECM | |||
* Programming file can be configured to only allow reprogramming based on previous software ID eligibility | |||
* Includes a detailed user-information update readme file authored by authorized engineering staff | |||
= | =MotoUpdateAuthor= | ||
[[File:MUA_screenshot.png|right|300px|thumb|MotoUpdateAuthor]] | |||
'''[[MotoUpdateAuthor]]''' is used to generate and maintain MotoUpdate (.mfu) files. | |||
=Downloads= | |||
'''MotoService''' | |||
{| class="wikitable" style="text-align: center;" cellpadding = "5" | |||
!scope="col" style = "width:200px;"|Product | |||
!scope="col" style = "width:200px;"|Downloads | |||
!scope="col" style = "width:200px;"|Notes | |||
''' | |- | ||
|MotoService 10.0.0.265 | |||
|rowspan="12"| | |||
'''[[MotoService_Downloads|Download]]''' | |||
|For new silver dongles only | |||
|- | |||
|MotoService 10.0.0.253 | |||
|For new silver dongles only | |||
|- | |||
|MotoService 10.0.0.244 | |||
|For new silver dongles only | |||
|- | |||
|MotoService 10.0.0.240 | |||
|For new silver dongles only | |||
|- | |||
|MotoService 8.13.8.207 | |||
|'''-''' | |||
|- | |||
|MotoService 8.13.7.192 | |||
|'''-''' | |||
|- | |||
|MotoService 8.13.7.140 | |||
|'''-''' | |||
|- | |||
|MotoService 8.13.7.120 | |||
|'''-''' | |||
|} | |||
'''MotoUpdateAuthor''' | |||
{| class="wikitable" style="text-align: center;" cellpadding = "5" | |||
!scope="col" style = "width:200px;"|Product | |||
!scope="col" style = "width:200px;"|Downloads | |||
!scope="col" style = "width:200px;"|Notes | |||
|- | |||
|MotoUpdateAuthor 10.0.0.253 | |||
|rowspan="5"| | |||
'''[[MotoUpdateAuthor Downloads|Download]]''' | |||
|For new silver dongles only | |||
|- | |||
|MotoUpdateAuthor 10.0.0.244 | |||
|For new silver dongles only | |||
|- | |||
|MotoUpdateAuthor 10.0.0.240 | |||
|For new silver dongles only | |||
|- | |||
|MotoUpdateAuthor 8.13.7.120 | |||
|'''-''' | |||
|} | |||
=Purchase= | |||
{| class="wikitable" style="text-align: center;" cellpadding = "5" | |||
!scope="col" style = "width:250px;"|Product | |||
!scope="col" style = "width:250px;"|Part Number | |||
!scope="col" style = "width:250px;"|Webstore | |||
''' | |- | ||
|MotoService only | |||
|ASM-MSVC-003A | |||
|'''[https://store.neweagle.net/shop/products/software/motohawk/motoservice/motoservice-kit-no-usb-to-can/ Purchase] | |||
|- | |||
|MotoService kit <br/> (includes single-channel USB-to-CAN interface) | |||
|ASM-MSVC-003A-1 | |||
|'''[http://store.neweagle.net/shop/products/software/motohawk/motoservice/motoservice-kit-single-channel-usb-can/ Purchase] | |||
|- | |||
|MotoService kit <br/> (includes dual-channel USB-to-CAN interface) | |||
|ASM-MSVC-003A-2 | |||
|'''[http://store.neweagle.net/shop/products/software/motohawk/motoservice/motoservice-kit-dual-channel-usb-can/ Purchase] | |||
|- | |||
|MotoService kit <br/> (includes galvanic, dual-channel USB-to-CAN interface) | |||
|ASM-MSVC-003A-2G | |||
|'''[http://store.neweagle.net/shop/products/software/motohawk/motoservice/motoservice-kit-dual-channel-galvanic-usb-can/ Purchase] | |||
|- | |||
|MotoService kit <br/> (includes single-channel USB-to-CAN interface) | |||
|ASM-MSVC-003A-3 | |||
|'''[http://store.neweagle.net/shop/products/software/motohawk/motoservice/motoservice-kit-oem-leaf/ Purchase] | |||
|} | |||
= Frequently Asked Questions (FAQ) = | |||
==Can MotoService be installed on a computer with MotoTune?== | |||
No, MotoTools does not support multiple versions installed simultaneously. For all MotoTools (MotoUpdate, MotoViewer, MotoTune and MotoServerRuntime) the user should have only one version installed. It is recommended to use Windows Add/Remove programs to uninstall the older version before starting a new installation. Also, the versions of MotoTune, MotoService and MotoServerRuntime must all be the same. | |||
== Is MotoService compatible with Windows 8?== | |||
No, MotoService is not currently compatible with Windows 8. | |||
== Is the MotoService Dongle compatible with USB 3.0?== | |||
This problem is caused by an error in the Windows 7 driver of the USB 3.0 controller which does not treat some USB commands correctly according to the USB specifications. | |||
However, independent from updates from Intel, we are currently testing a new driver version for the CRYPTO-BOX with a workaround for this USB 3.0 problem. If you want to test this driver, please download it here: www.marx.com/ftp/temp/USB3/CBU_Test_Drv_21Jan2013.zip | |||
IMPORTANT: The driver should work fine but is currently not yet digitally signed! To install it under Windows 7 64-bit versions, you have to restart the computer and hit the F8 key multiple times before Windows starts. Then choose "Disable Driver Signature Enforcement". This has to be done each time Windows starts when using this driver. We will offer a WHQL certified version of the driver as soon as we have finished testing and passed certification procedure. Make sure that you have plugged in the CRYPTO-BOX. Unzip the driver package. Open the Device Manager, right-click on the "CBUSB ver 2.0" device and choose "Update Driver Software" -> "Browse my computer for driver software" -> "Let me pick from a list of device drivers on my computer" -> "Have Disk". Now select the corresponding 32- or 64-bit .INF file from the driver package and click "OK". If Windows says that the driver is not signed, choose that you want to install the driver anyway. | |||
'''Another USB 3.0 Workaround''' | |||
Turn off the xHCI mode in your computer's BIOS settings. This will cause the super-speed of the USB 3.0 interface to throttle down to high-speed (USB 2.0); in our tests it ran perfectly. Most motherboards allow you to disable the xHCI mode in the BIOS selectively to individual USB 3.0 ports, so you can still use the other ports at full speed. | |||
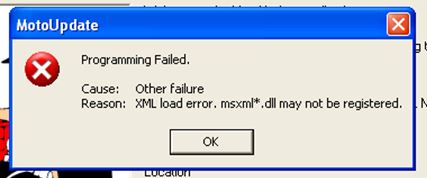
==Why do I see an "XML load error"?== | |||
[[image: Motoservice_error.JPG]] | |||
This error is caused when .net framework 4.0 becomes corrupted or deleted. Re-install .net framework 4.0 to fix the issue. The .net framework is freely available for download on the web. | |||
== How do I create a MotoService install package for my service technicians? == | |||
''' | Download '''[http://www.neweagle.net/support/wiki/docs/RequiredFiles/MotoService_RELEASE_8_13_7_120.zip MotoService]''', and unzip that file on your engineering machine. Inside, the zip will look like this: | ||
[[File:motoservice_unzip1.jpg]] | |||
[[ | |||
Inside 'ecufiles', add 'Programs' and 'TDBDLL', so it looks like: | Inside 'ecufiles', add 'Programs' and 'TDBDLL', so it looks like: | ||
| Line 191: | Line 166: | ||
[[File:motoservice_unzip2.jpg]] | [[File:motoservice_unzip2.jpg]] | ||
You can add any | |||
You can add any MFU's or '''[[MotoTune]]''' dll's that are needed for your customers. You might want to add a 'Displays' folder, too, with any MotoTune displays your service technicians will need. | |||
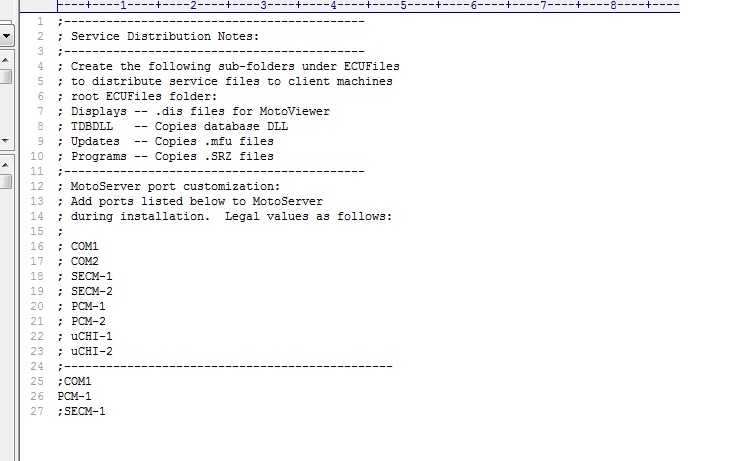
You can edit PortInfo.cfg to add/remove ports (these will be added/removed on the installed machine). | You can edit PortInfo.cfg to add/remove ports (these will be added/removed on the installed machine). | ||
| Line 199: | Line 175: | ||
The example above will make it so that your customer has just PCM-1 on the machine after running the installer. | The example above will make it so that your customer has just PCM-1 on the machine after running the installer. | ||
After these steps | |||
After these steps are complete, move the whole folder to a thumb drive (you might burn it to a CD) and then install on a new machine, running 'MotoService RELEASE 8.13.7.120.exe' from the thumb drive. Do not zip up the files, simply copy the whole directory out to the thumb drive (or burn to CD). See below: | |||
[[File:motoservice_thmb.jpg]] | [[File:motoservice_thmb.jpg]] | ||
When installed on a clean machine, you should see that the ECUFiles is replicated in the C:\ECUFiles\ folder required for the tools to connect to the ECU, and only port PCM-1 is available ( | When installed on a clean machine, you should see that the ECUFiles is replicated in the C:\ECUFiles\ folder required for the tools to connect to the ECU, and only port PCM-1 is available (like the example above). | ||
Latest revision as of 19:41, 9 March 2023
New Eagle > Products Wiki > MotoHawk Platform > MotoService
Introduction
MotoService consists of two powerful applications in one package. MotoService combines MotoViewer which is an economical display and diagnostic tool and MotoUpdate for field flashing of electronic control units. MotoService is used to distribute the following two apps to vendors in one installation file.
MotoViewer
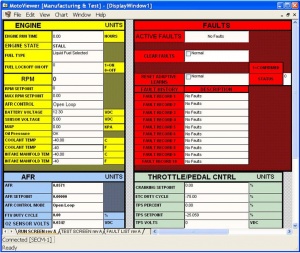
MotoViewer provides an economical solution for basic ECM data and diagnostic needs.
Key Features:
- Graphical data logging
- Detailed fault diagnostic list
- View ECM fault history
- Clear active and historic faults
- View engine runtime hours
- View engine sensor data
- Chart option to graph data
- Extensive use of Microsoft GUI standards to promote user familiarity
- Comprehensive online help system
MotoUpdate
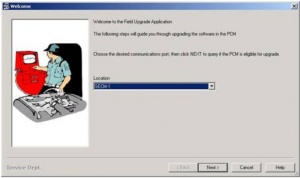
The MotoUpdate tool provides an easy solution for reprogramming ECMs in the field or service shop.
Key Features:
- User friendly application — limited PC experience required to operate
- Allow field/service personnel to update an ECM when new calibrations are required
- Simple one-step process
- Save time and money by updating the ECM on site.
- Easy-to-use application
- Operator friendly: requires basic computer skills to initiate the programming download to ECM
- Programming file can be configured to only allow reprogramming based on previous software ID eligibility
- Includes a detailed user-information update readme file authored by authorized engineering staff
MotoUpdateAuthor
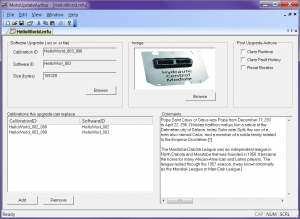
MotoUpdateAuthor is used to generate and maintain MotoUpdate (.mfu) files.
Downloads
MotoService
| Product | Downloads | Notes |
|---|---|---|
| MotoService 10.0.0.265 | For new silver dongles only | |
| MotoService 10.0.0.253 | For new silver dongles only | |
| MotoService 10.0.0.244 | For new silver dongles only | |
| MotoService 10.0.0.240 | For new silver dongles only | |
| MotoService 8.13.8.207 | - | |
| MotoService 8.13.7.192 | - | |
| MotoService 8.13.7.140 | - | |
| MotoService 8.13.7.120 | - |
MotoUpdateAuthor
| Product | Downloads | Notes |
|---|---|---|
| MotoUpdateAuthor 10.0.0.253 | For new silver dongles only | |
| MotoUpdateAuthor 10.0.0.244 | For new silver dongles only | |
| MotoUpdateAuthor 10.0.0.240 | For new silver dongles only | |
| MotoUpdateAuthor 8.13.7.120 | - |
Purchase
| Product | Part Number | Webstore |
|---|---|---|
| MotoService only | ASM-MSVC-003A | Purchase |
| MotoService kit (includes single-channel USB-to-CAN interface) |
ASM-MSVC-003A-1 | Purchase |
| MotoService kit (includes dual-channel USB-to-CAN interface) |
ASM-MSVC-003A-2 | Purchase |
| MotoService kit (includes galvanic, dual-channel USB-to-CAN interface) |
ASM-MSVC-003A-2G | Purchase |
| MotoService kit (includes single-channel USB-to-CAN interface) |
ASM-MSVC-003A-3 | Purchase |
Frequently Asked Questions (FAQ)
Can MotoService be installed on a computer with MotoTune?
No, MotoTools does not support multiple versions installed simultaneously. For all MotoTools (MotoUpdate, MotoViewer, MotoTune and MotoServerRuntime) the user should have only one version installed. It is recommended to use Windows Add/Remove programs to uninstall the older version before starting a new installation. Also, the versions of MotoTune, MotoService and MotoServerRuntime must all be the same.
Is MotoService compatible with Windows 8?
No, MotoService is not currently compatible with Windows 8.
Is the MotoService Dongle compatible with USB 3.0?
This problem is caused by an error in the Windows 7 driver of the USB 3.0 controller which does not treat some USB commands correctly according to the USB specifications.
However, independent from updates from Intel, we are currently testing a new driver version for the CRYPTO-BOX with a workaround for this USB 3.0 problem. If you want to test this driver, please download it here: www.marx.com/ftp/temp/USB3/CBU_Test_Drv_21Jan2013.zip
IMPORTANT: The driver should work fine but is currently not yet digitally signed! To install it under Windows 7 64-bit versions, you have to restart the computer and hit the F8 key multiple times before Windows starts. Then choose "Disable Driver Signature Enforcement". This has to be done each time Windows starts when using this driver. We will offer a WHQL certified version of the driver as soon as we have finished testing and passed certification procedure. Make sure that you have plugged in the CRYPTO-BOX. Unzip the driver package. Open the Device Manager, right-click on the "CBUSB ver 2.0" device and choose "Update Driver Software" -> "Browse my computer for driver software" -> "Let me pick from a list of device drivers on my computer" -> "Have Disk". Now select the corresponding 32- or 64-bit .INF file from the driver package and click "OK". If Windows says that the driver is not signed, choose that you want to install the driver anyway.
Another USB 3.0 Workaround
Turn off the xHCI mode in your computer's BIOS settings. This will cause the super-speed of the USB 3.0 interface to throttle down to high-speed (USB 2.0); in our tests it ran perfectly. Most motherboards allow you to disable the xHCI mode in the BIOS selectively to individual USB 3.0 ports, so you can still use the other ports at full speed.
Why do I see an "XML load error"?
This error is caused when .net framework 4.0 becomes corrupted or deleted. Re-install .net framework 4.0 to fix the issue. The .net framework is freely available for download on the web.
How do I create a MotoService install package for my service technicians?
Download MotoService, and unzip that file on your engineering machine. Inside, the zip will look like this:
Inside 'ecufiles', add 'Programs' and 'TDBDLL', so it looks like:
You can add any MFU's or MotoTune dll's that are needed for your customers. You might want to add a 'Displays' folder, too, with any MotoTune displays your service technicians will need.
You can edit PortInfo.cfg to add/remove ports (these will be added/removed on the installed machine).
The example above will make it so that your customer has just PCM-1 on the machine after running the installer.
After these steps are complete, move the whole folder to a thumb drive (you might burn it to a CD) and then install on a new machine, running 'MotoService RELEASE 8.13.7.120.exe' from the thumb drive. Do not zip up the files, simply copy the whole directory out to the thumb drive (or burn to CD). See below:
When installed on a clean machine, you should see that the ECUFiles is replicated in the C:\ECUFiles\ folder required for the tools to connect to the ECU, and only port PCM-1 is available (like the example above).
